Enemies in Wario World
A list of enemies and bosses that Wario faces in Wario World.
Bosses[edit]
Greenfist[edit]
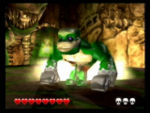
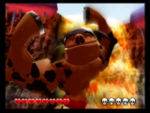
This dino has small legs and huge arms that seem to be metal claws of some sort. Although he is not particularly fast, he is quite strong. Wario was able to defeat him by pummeling him from behind and then piledriving him into the ground. Whenever he would take too much punishment, Greenfist would turn red and go into a fit of rage. After defeating Greenfist, Wario was able to proceed to the next level.
Sandworm[edit]
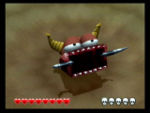
The boss of Greenhorn Ruins. This large worm lived inside a giant pit of sand (quite similar to an antlion). It fought Wario by burrowing and reemerging in different areas. Its most basic attack was spitting a group of spikes out of its mouth. Its other attack involved emerging from the sand and revealing its preying mantis-like claws and attempting to slice and dice Wario. After enough punishment, Sandworm was defeated. After defeating Sandworm, Wario was able to proceed to the final boss battle for the Excitement Central area.
DinoMighty[edit]
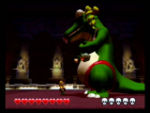
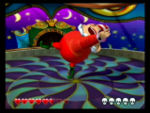
The final boss for the Excitement Central Area. DinoMighty is a collosal dinosaur that, oddly enough, wears a red bikini and curly yellow hair. With her size, DinoMighty was able to easily squash Wario under her feet. Her weight also allowed her to create shockwaves on the ground when she landed. Wario was able to defeat Dinomighty by pummeling her and then piledriving her or simply pushing her into the surrounding lava. After defeating DinoMighty, Wario earned the DinoMighty Key and proceeded to the next area, Spooktastic World.
Brawl Doll[edit]
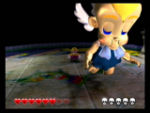
The boss of Horror Manor. Brawl Doll is a giant creepy angel toy that Wario had to face. It was able to fly around the stage and fire rays of energy on the stage. These energy beams would zigzag around the stage, making it difficult for Wario to attack. Wario was able to pummel the doll enough times and piledrive it into oblivion. After defeating Brawl Doll, Wario was able to proceed to Wonky Circus.
Clown-A-Round[edit]
The boss of Wonky Circus. Clown-A-Round was a largish clown that looked rather toylike. He rode around on a giant ball across a tightrope (that Wario couldn't walk on, ironically). He attacked by pulling off his head and pulling another from his stomach and having his heads float around the area. At this point he exposed himself and Wario was able to pummel him. Clown-A-Round was able to regenerate new heads, quickly filling the stage with several floating clown heads. He was also able to throw bombs from across the tightrope if Wario did not follow Clown-A-Round to the other side of the stage. After defeating Clown-A-Round, Wario was able to proceed to the final boss battle for the Spooktastic World area..
Dual Dragons[edit]
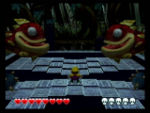
The boss of the Spooktastic World area. The Dual Dragons were two large dragons that appeared on either side of a platform in a swamp-like area. These two dragons attacked using primarily their spiked claws and breathing attacks. While one of the dragons would spit out Glue Globes, the other would start sucking them in. This was particularily dangerous to Wario, who would get stuck to a globe and get eaten and spit back out. The other breathing attack was fire breath. Wario was able to turn the two dragons on eachother by pummeling one and letting the fire breath from the other fry his companion. After defeating the Dual Dragons, Wario was able to proceed to the next area, Thrillsville.
Winter Windster[edit]
The boss of Shivering Mountains. The Winter Winter was a strange loooking floating head that floated around with a bunch of bubbles behind it. This tough boss used a variety of attacks to defeat Wario. Its most basic attack was dropping bombs, which Wario was able to throw into the magma and knock Winter Windster out of the air. The other attacks included ice breath, creating shock waves, and laser bolts that followed Wario around. When its red eyes would start glowing, it was able to possess Wario and force him into the spiked rocks surrounding the area. By making the magma erupt with the bombs, Wario was able to pummel Winter Windster and piledrive it. After defeating the Winter Windster, Wario was able to proceed to Beanstalk Way.
Spideraticus[edit]
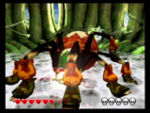
The boss of Beanstalk Way. Spideraticus was a gigantic spider that fought Wario on the top of its own web. It attacked with basic energy attacks, ground pounding to create shockwaves, shooting web from its spinnerets at Wario. It also spat out Glue Globes and would suck one back in. Wario was able to use these Glue Globes to get above Spideraticus and ground pound him from above. Wario was able to then pick up the spider and spin him around and throw him into the wall. After defeating Spideraticus, Wario was able to proceed to the final boss of Thrillsville.
Red Brief J.[edit]
The boss of the Thrillsville Area. Red Brief J is a creature named after the red briefs he wears, oddly enough. Wario met this boss on a metal platform above a pool of lava. Wario was unable to damage Red Brief J at all, as punching him only made him madder. Wario was able to avoid his variety of attacks, which included energy bolts, elbow dropping on Wario, and a spinning attack. He would also slam the middle of the platform and cause the lava to seep up on the platform. Wario was able to use that same trick against him by slamming on the platform and causing Red Brief J to fall into the lava. After defeating Red Brief J, Wario was able to proceed to the next area, Sparkle Land.
Mean Emcee[edit]
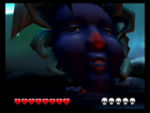
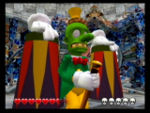
The boss of Mirror Mansion. Mean Emcee was a strange green colored man who fought using trickery rather than brawn. His main method of attack was spinning his cane around while walking around. After enough abuse from Wario, he would hide under one of three cups. The cups would then spin around and Wario would punch the one he though Mean Emcee was under. If he got the wrong one, enemies would come out to fight Wario. If he got the right one, Mean Emcee would hide inside of the cup, forcing Wario to knock him out. Wario piledrived the performer into the ground each time, despite the cups getting progressively faster. After defeating Mean Emcee, Wario was able to proceed to Pecan Sands.
Ironsider[edit]
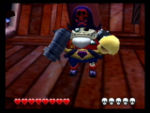
The boss of Pecan Sands. Ironsider was a statue-like being that consisted of a head and hands. The two hands were capable of flattening Mario. The head itself would spit out energy bolts, slam into the ground and create shock waves, and breathing out fire. Wario was able to defeat Ironsider by pummeling one of the hands and using it to attack the head with. After defeating Ironsider, Wario was able to proceed to the final boss of the Sparkle Land area.
Captain Skull[edit]
The boss of the Sparkle Land area. Captain Skull was a undead pirate whose right arm had been completely replaced by a cannon. With his cannon he was able to fire energy beams to hit Wario with. He also was able to fire out large bombs from the cannon as well, including a giant bomb that took up nearly half of the ship's width. In order to propel himself around the stage, his cannon could shoot out a hook to latch unto the mast of the ship. Doing so prevented him from falling in the water if he was knocked off the boat.
Although Wario was able to pummel and piledrive him the first few times, Captain Skull became more subborn after getting thrashed around. He then started rolling around in a ball and firing himself at Wario to prevent getting attacked. In order to finally defeat him, Wario started using Captain's Skull's bombs against him. After defeating Captain Skull, Wario retrieved the final key neccessary to face the Dark Jewel.
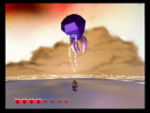
Black Jewel[edit]
The final boss in the game. Long ago there existed a Black Jewel that could turn desire into power. As a result, monsters began flooding the world. The Spritelings were able to seal away the Black Jewel and seal it away inside the ruins. However Black efforts were foiled when Wario found the Dark Jewel and added it to his collection. Shortly after Black Jewel rose again. It destroyed Wario's castle, scattered his treasure, turned his coins into minions, and imprisoned the Spritelings. It then began to create its own twisted 'world', these being the eight levels from "Wario World".
Ultimately the Black Jewel was foiled by Wario. The greedy treasure hunter defeated the Dark Jewel's minions, freed the Spritelings, and assembled the key to open the giant treasure chest that the Black Jewel was hiding inside. When this happened, the Black Jewel grew four tentacles and a single eye. It used this eyes to create a line of fire with which to prevent Wario from freeing the now crystallized Spritelings. The combined might of the Spritelings and Wario's piledriver move was enough to shatter the Black Jewel for good.
